Install WHMCS with Softaculous
If you want to install a fresh instance of WHMCS on your cPanel account you can do so very easily with Softaculous. Softaculous is an auto-installer for cPanel that can auto-install over 266 useful scripts. WHMCS, a management, billing, and support solution for online businesses, is an add-on product that costs $10 per month.
Note: if Softaculous isn't currently available in your cPanel account (Shared hosting customers get it by default) you can request to have it installed by our friendly and helpful support staff! It's a mere $3 a month, and one of the best features of Softaculous is that you can set it to auto-update your WordPress version! As each new version of WHMCS includes valuable security patches that keep your site safe and secure, we think Softaculous is a worthy buy.
To get started:
In the Admin Account section:
-
Login to cPanel for the domain.
-
Navigate to the Softwaresection and click Softaculous Apps Installer.
-
Hover your mouse over the WHMCS icon and click Install.
-
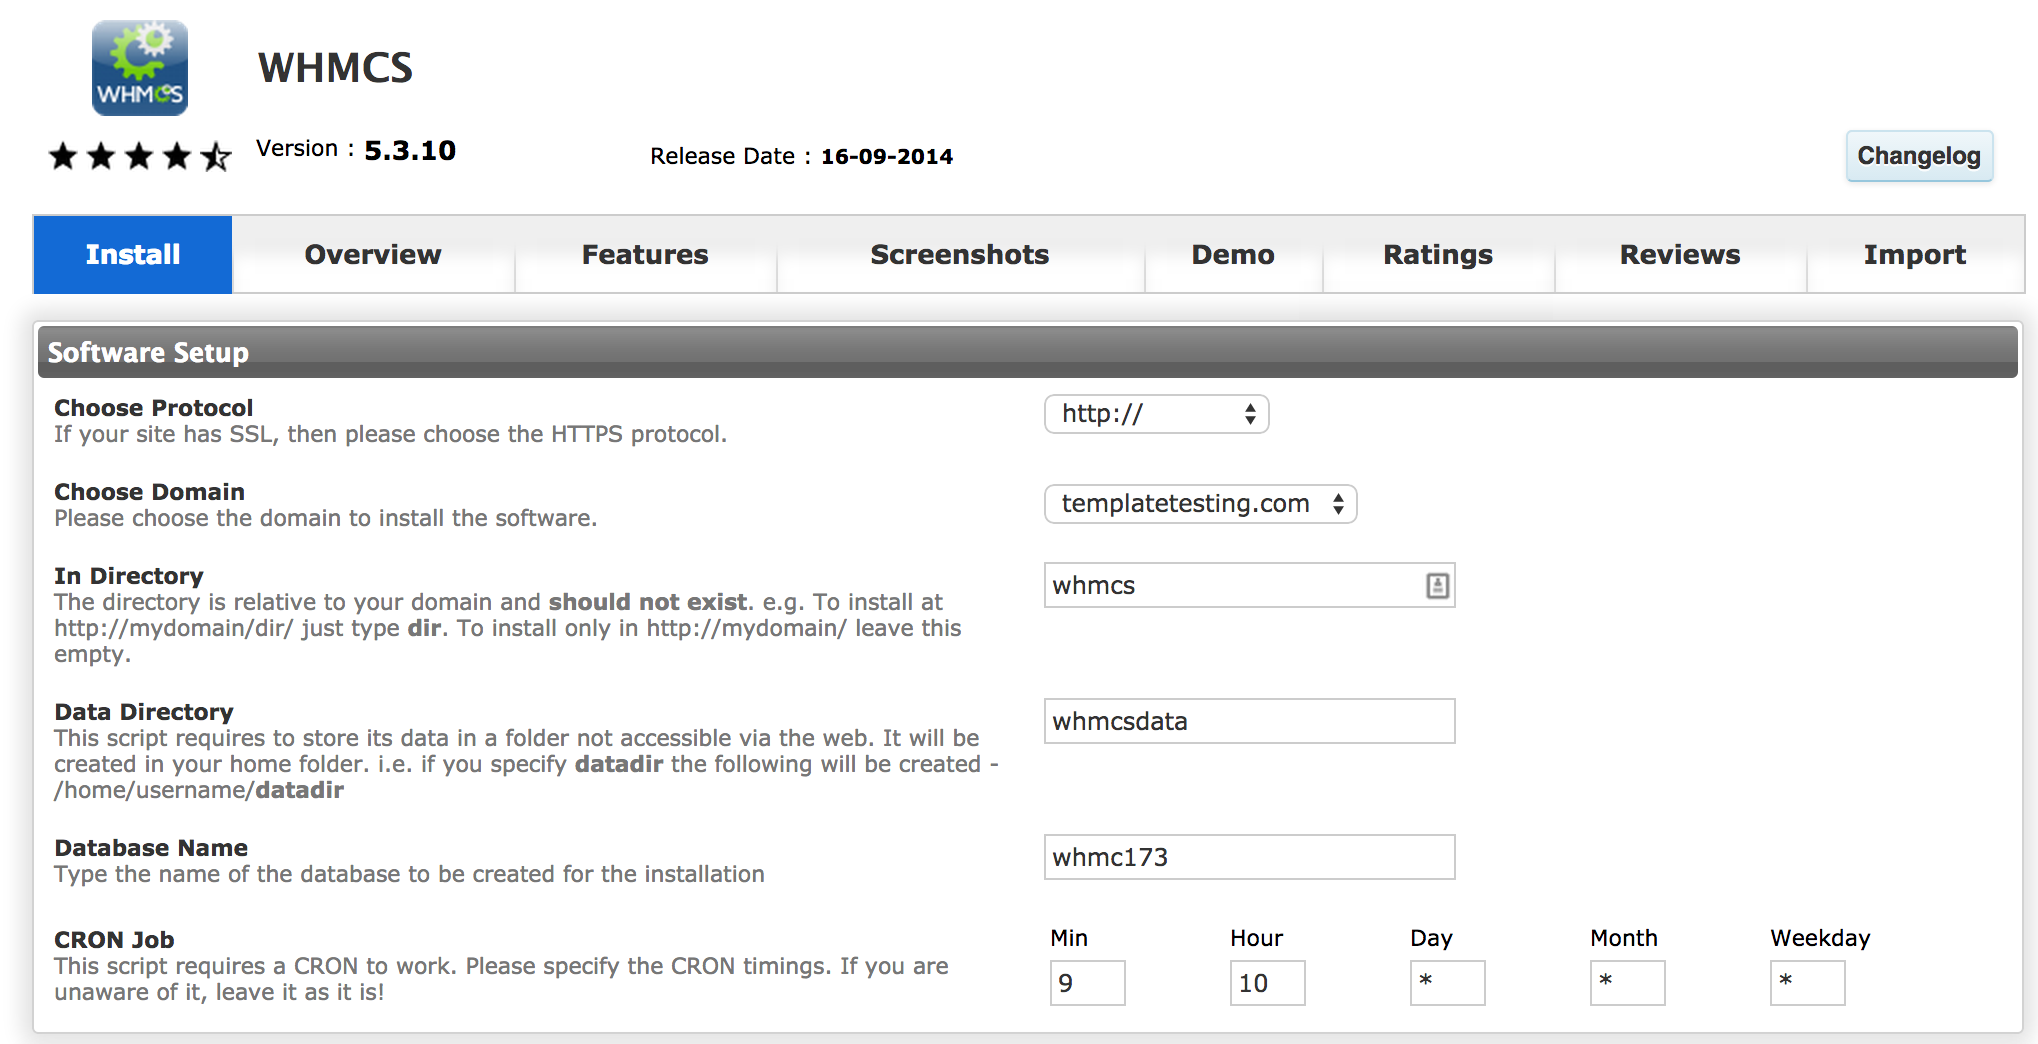
On the Install screen in the Software Setup section:
-
Protocol can be left unchanged unless you have a SSL certificate installed on the domain or prefer the 'www' prefix to exist for the site address.
-
Choose your target domain from the dropdown menu.
-
If you would like to have the software installed in the root of your domain, leave the In Directory option empty; otherwise input directory name relative to the domain's folder.
-
The Data Directory section does not need to be changed unless required or preferred.
-
Leave Database name as is unless you'd like a different name.
-
The CRON Job field can be left with its defaults unless you'd like the cronjob to execute at a specific time.
-
-
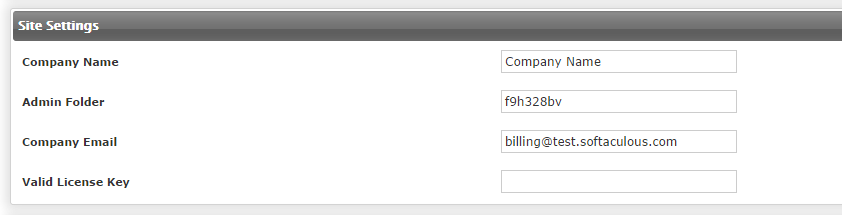
In the Site Settings section:
-
Modify Company Name as desired (it can also be modified in the WHMCS dashboard later).
-
Change the Admin Folder to something not as easily guessed to help avoid potential attacks.
-
Change the Company Email to a working email address for WHMCS notifications.
-
Input your License Key in the Valid License Key field.
-
-
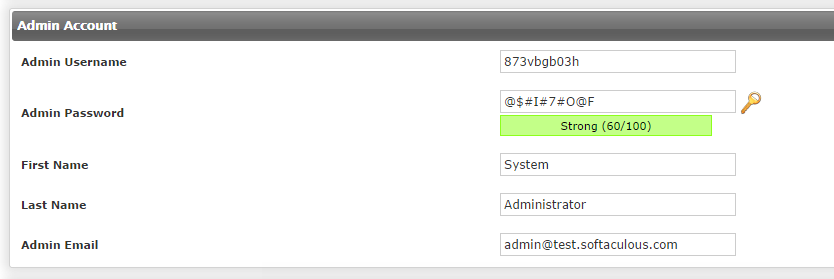
In the Admin Account section:
-
Important! Change the administrative username to something other than 'admin' to minimize risk of someone guessing it.
-
Choose a strong password for the Admin Password, or click the Key icon to generate a random password.
-
Fill out the First and Last Name fields as desired.
-
Enter a working email address for the Admin Email.
-
-
Click the arrow to the left of Advanced Options and alter the configurations as you choose, you can also email the installation details to a chosen email address.
-
Select the appropriate language for the board in the Choose Language section.
-
Click the Install button.
Your login address will be displayed once the install is complete.